Webhooks
About Webhooks
Webhooks allow customers and 3rd parties to monitor specific events of interest within the CredoAI platform, enabling automated data transfers to your server as events occur.
Utilizing webhooks eliminates the need for repetitive API polling to verify data presence. Once configured, webhooks ensure timely data delivery, eliminating the need for further intervention.
Webhooks can be effectively employed to track updates to use cases, new task assignments, and status updates for reviews, enhancing operational efficiency and responsiveness.
Webhook testing user flow
-
Generate a URL using your existing event server. You can also generate the URL using a free webhook testing website such as Svix Playground
-
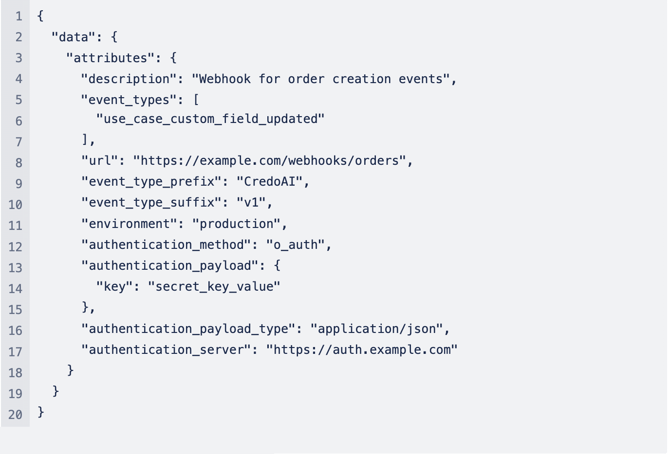
Create a webhook using a POST request in Postman. The POST request should include configuration information such as the url of your event server and the event_type subscriptions.
-
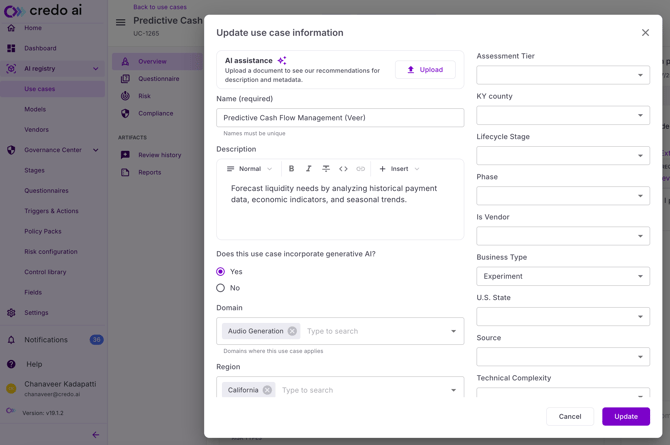
Make changes in the app that correspond to the events you subscribed to
-
Credo AI triggers the registered webhook. You can view payload of the triggered event, with details of change done in Credo AI, in Svix Playground
Configuring Webhooks
Note: this guide assumes that you are familiar with the CredoAI API and already know how to handle authentication with the platform.
Webhooks can be created and managed via the CredoAI API. When creating your webhooks, you will need to provide information such as the URL endpoint you need to hit, the event types that you want to trigger the webhook, and possibly authentication information, depending on your setup.
This is an example of a typical request used to create a webhook:
POST ${url}/api/v2/${tenant}/webhooks


Supported Event Types
CredoAI Webhooks support the following event types,

Webhook Setup Example
Step 1: Configuring your test endpoint
Note: If you already have an event server setup, you can test with that. Skip to Step 2 and use that as your url. Otherwise, follow Step 1 to configure a test endpoint.
-
Navigate to Svix Playground
-
Click “Start Now”

-
Bookmark the current page, and copy the value shown here. You will use this as the url when configuring your webhook in Step 2

Step 2: Creating your webhook
Using the new url from your new test endpoint or existing event server, create your webhook via the API described above. You will need to authenticate and following similar practices to other APIs in the CredoAI API.
If you are using a test endpoint from Svix Playground, you can set “authentication_type” to “none”. Otherwise, if you are using your own event server, set the authentication information appropriately.
You can use any valid event types to test your webhook, but a good one to test with is “use_case_custom_field_updated”.

Step 3: Make a change to your use case
Assuming that you set “use_case_custom_field_updated” as an event type, you can test by navigating to the Use Case Information page, updating one or more custom fields, and then saving the updates.

Step 4: View the results
If you used an existing event server, confirm that the appropriate message was received by your server. If you’re using Svix Playground, return the URL that you bookmarked in Step 1. You should see one or more new messages in the top left corner. Click on one of the messages to see the payload.
